Showing posts with label chocolate. Show all posts

Sunday, February 17, 2013

Miniature Devil's Food Cupcakes


As promised last week, here's the recipe from the cupcakes pictured with the chocolate buttercream frosting. The recipe is an adaptation of a recipe from the Chocolate Bliss recipe collection pictured at the right. You can purchase it on Barnes & Noble online or Amazon.

One funny thing about the recipe is that the directions start off with "This one-bowl batter makes dark, moist, cupcakes." The recipe then proceeds to give directions to use small, medium, and large bowls! Ha! So much for "one-bowl batter."

The cupcakes were pretty tasty, but to be honest, I'd just as soon use a Duncan Hines Devil's Food cake mix.

Nonetheless, here's the recipe.


Miniature Devil's Food Cupcakes

Ingredients:
1/4 cup cocoa
1/4 cup boiling water
3 tablespoons buttermilk*
2/3 cup flour
1/2 teaspoon baking soda
1/8 teaspoon salt
3-1/3 tablespoons butter
2/3 cup brown sugar
1 egg
1/2 teaspoon vanilla

*If you don't have buttermilk, add one teaspoon lemon juice to 2 tablespoons + 2 teaspoons milk. Stir and let sit five minutes.

Preheat oven to 350 degrees. Line mini-muffin pan with baking cups.

In medium bowl, stir the cocoa and hot water together. Add buttermilk and stir until blended. 

In a small bowl, combine the flour, baking soda and salt.

In a large bowl, beat the butter with an electric mixer. Add sugar and beat until fluffy. Beat in egg and vanilla. Gradually beat in cocoa mixture and flour mixture. (See what I mean about three bowls?)

Using a small cookie scooper, scoop batter in mini muffin cups. Bake 10-15 minutes or until toothpick inserted in center comes out clean. Cool in pan for two minutes. Remove to cooling racks and cool completely before frosting.

Sunday, January 27, 2013

Black Forest Pudding Pie

I made two of these for a family potluck dinner. They were easy to make, didn't bother anyone's egg or nut allergies, and tasted pretty yummy. However, they were a little soft and sloppy when they were cut. If I made them again, I might try a little less milk so that the pudding becomes even thicker. 


Black Forest Pudding Pie
 
Ingredients:

Oreo pie crust (8-inch)
3 oz. chocolate instant pudding
1-3/4 cup cold milk
1/2 tub of Cool Whip
1/2 can of cherry pie filling

You can either make your own Oreo cookie pie crust or buy the prepared kind. If you make your own in a 9-inch pie plate, I'd recommend doubling the remaining ingredients.

In a medium bowl, whisk together the pudding mix and the cold milk for two minutes. Pour into pie crust. Refrigerate at least one hour.

While the pudding is setting, be sure to put the Cool Whip into the fridge to thaw it. Spread the Cool Whip on top of the chocolate pudding.


Spoon the cherry pie filling on top of the Cool Whip.

Yummy! You really can't go wrong with cherry and chocolate, can you?

Sunday, December 30, 2012

Chocolate-Cherry Bonbons

I hope everyone had a great Christmas. A good number of cookies have been baked in the last two weeks, so I should have some good blog content for the next month or so. 

I'll start off my Christmas cookie wrap-up with a cookie I made in early December. It's a variation of Rachel Ray's Chocolate-Orange Bonbons. Since I had no candied orange peel around, I used dried cherries instead. Yummy! 


Chocolate-Cherry Bonbons 

Ingredients:
1 cup sugar
4 tablespoons unsalted butter, softened 
1/4 teaspoon salt 
1 egg 
1 teaspoon vanilla 
1 egg white 
1/2 cup cocoa powder 
1-1/4 cups flour 
1 teaspoon baking powder 
1/2 cup chopped dried cherries 
1/3 cup white chocolate chips 
1/4 cup powdered sugar 
4 ounces semisweet chocolate 

Preheat oven to 350 degrees. 

In mixer, cream sugar, butter, and salt until well blended. Add egg, vanilla, and egg white. Beat for one minute. 

Add cocoa powder and blend at medium speed. Add flour and baking powder. Blend until thoroughly combined. Stir in half of chopped dried cherries (save other half for topping) and white chocolate chips. 

Line cookie sheets with parchment paper. Shape dough into balls and roll in powdered sugar. Place on prepared pans. Bake one pan at a time. If you have a second pan ready, place it in the refrigerator until first pan is finished in oven. Bake 15 minutes. Cool two minutes before removing to wire rack. 

Melt semisweet chocolate in microwave-safe bowl, stirring occasionally until chocolate is smooth. Top cookies with melted chocolate and chopped dried cherries. Let set (about 1 hour) before storing.

Sunday, October 14, 2012

Chocolate Raspberry Brownies

Warning! These turned out super rich. Consume in small quantities.

Chocolate Raspberry Brownies

Ingredients:
4 oz. unsweetened chocolate, divided
1/2 cup butter
1-1/3 cups sugar
2 eggs
2/3 teaspoon vanilla
2/3 cup flour
1 can raspberry cake and pastry filling
4 oz. semisweet chocolate
2/3 cup heavy whipping cream


Preheat oven to 350 degrees. Line 9x9 pan with foil, leaving enough to hang over the sides. Lightly coat the foil with cooking spray.

Microwave three ounces of the unsweetened chocolate with the butter about two minutes. Stir until smooth. Add sugar, eggs, and vanilla. Mix well. Add flour into mixture and pour into prepared pan.

Bake 30 minutes. Cool on wire rack.

Spread a thin layer of the raspberry cake and pastry filling over the cooled brownies.

Chop the remaining unsweetened chocolate and semisweet chocolate. In a small bowl, microwave the whipping cream until it boils. Add the chopped chocolate and stir until smooth. Spread over raspberry layer.

Refrigerate one hour. Place a few tablespoons of the remaining raspberry cake and pastry filling in a decorating bake with a small piping tip. Drizzle raspberry filling over brownies. Cut into small pieces.

Sunday, September 30, 2012

Homemade Twix Bars

This recipe comes from the Kraft website. They called them Chocolate-Caramel Cookie Bars, but basically they are homemade Twix bars. Pretty simple and definitely yummy.


Homemade Twix Bars

Ingredients:
1 box of Lorna Doone shortbread cookies
1 package of caramels (the kind you use for making caramel apples)
1 tablespoon milk
3 oz. semi-sweet chocolate
3 oz. white chocolate

Line 9x13 pan with foil, leaving enough to hang over the sides for a handle later. Use the Reynolds non-stick foil if possible. If not, give the foil a light dusting of cooking spray.

Create a single layer of shortbread cookies on the foil. I had to break some cookies in half to make them fit.

Melt the caramel and the milk in the microwave for two minutes, stirring every thirty seconds. Pour over shortbread cookies and spread until even.

Microwave both types of chocolate in a small bowl for two minutes, again stirring every thirty seconds. When chocolate is smooth, pour it over the caramel layer.

Refrigerate for two hours. Before serving, take it out of the refrigerator and let it soften for fifteen minutes before cutting into bars.

Sunday, April 29, 2012

Marble Brownies

These brownies didn't turn out as moist as I would have liked, but I did enjoy the combination of white chocolate and semi-sweet chocolate on top.


Marble Brownies

Ingredients:
3 ounces semisweet chocolate
1 ounce unsweetened chocolates
1/2 cup butter
2 tablespoons cocoa powder
1 cup sugar
1/4 teaspoon salt
3 eggs
1 teaspoon vanilla
1 cup flour
1/2 teaspoon baking powder
3/4 cup semisweet chocolate chips
3/4 cup white chocolate chips

Preheat oven to 350 degrees. Line a 9x9-inch pan with aluminum foil. Leave some foil over the edge for handles. Spray foil with cooking spray.

In a small bowl, melt the 3 ounces of semisweet chocolate, 1 ounce of unsweetened chocolate, and butter for one minute on high. Add cocoa powder and stir. The butter should be all melted, but the chocolate won't. Microwave another 30 seconds and stir until smooth.

In a large bowl, combined the sugar and salt. Stir in the melted chocolate mixture. Add the eggs, stirring after each addition. Stir in vanilla. Place flour and baking powder into sifter and sift into mixture.

Spread in pan and bake for 25 minutes. Remove from oven.

Sprinkle semisweet chips and white chocolate chips on top. Bake one more minute. Then use knife to swirl the two types of chocolate on top. Use foil handles to lift brownies from pan.

Monday, March 19, 2012

Dark Chocolate Fudge Brownies

Usually, I post my recipes on Sunday, but this was an especially busy weekend. I made these brownies a week (two weeks?) ago. They turned out slightly drier than I would have liked, so if I made them again, I might add a fudge frosting to them.

Dark Chocolate Fudge Brownies

Ingredients:
3/4 cup flour
1 cup sugar
3/4 cup cocoa
1 teaspoon baking powder
1/4 teaspoon salt
2 oz. bittersweet chocolate
1/3 cup milk
6 tablespoons butter, melted
1 teaspoon vanilla
2 eggs
3.5 oz dark chocolate
1/3 cup walnuts, chopped

For the 3.5 oz of dark chocolate, I used a Cadbury royal dark candy bar and chopped it into chunks.

Preheat oven to 350 degrees.

In a large bowl, combine flour, sugar, cocoa, baking powder, and salt.

In a small microwave-safe bowl, melt the 2 oz. of bittersweet chocolate with the milk. (About 90 seconds should do it. Try stirring halfway through.)

Add butter, vanilla, and eggs to melted chocolate. Then add the mixture to the dry ingredients in the large bowl. Stir in the dark chocolate chunks.

Pour into a 9-inch square baking pan coated with cooking spray. Sprinkle with nuts. Bake at 350 for 20-23 minutes or until toothpick inserted in center comes out with a few moist crumbs. Cool in pan on wire rack.

Sunday, March 4, 2012

Chocolate Meringues with Raspberry Cream Filling

I found a recipe for making meringue "cups" in my Better Homes and Garden Cookbook. They looked intriguing as I've never made meringues before; however, these were hazelnut-flavored, and I wanted chocolate, so I did some online research, found out how to make chocolate meringues and then played around with the cream filling to work with the ingredients I had at home.

The chocolate candy pieces you see on top are made from Wilton candy melts and one of the candy molds (really easy to do--directions are on the mold). I served these up on Oscar night.

Chocolate Meringues with Raspberry Cream Filling

Ingredients for Meringue Cups:
4 egg whites
1 teaspoon vanilla
1/4 teaspoon cream of tartar
1-1/3 cups sugar
3 tablespoons cocoa

Ingredients for Raspberry Cream Filling:
3 oz. cream cheese, softened
2 tablespoons butter or margarine, softened
1/3 cup sugar
1 cup whipping cream
1/2 cup Solo brand Raspberry Cake & Pastry Filling

Allow egg whites to stand at room temperature for 30 minutes.

Cover two cookie sheets with parchment paper. Draw ten 3-inch circles on paper. Be sure to leave at least 2 inches between each circle.

In a large mixing bowl, combine egg whites, vanilla, and cream of tartar. Using the whisk attachment on your mixer, beat the ingredients on medium speed until soft peaks form. This will take several minutes. The mixture is ready when you are able to get the tips of the peaks to curl over when you lift up the whisk attachment.

Gradually add 1-1/3 cups sugar, one tablespoon at a time. This should take about four minutes on high speed, after which you should get stiff peaks (tips do not curl over at all), and the sugar should be almost dissolved. Gently fold in the cocoa until it is evenly incorporated into the mixture.

Put meringue mixture into a decorating bag with a large open tip like #12. Pipe the bottom of the meringue cups within the 3-inch circles you drew on the parchment paper. Then pipe up the sides to form a cup. Bake in 300-degree oven for 35 minutes. Do not open the door. Turn off the oven and let meringues dry in there for an hour. Remove from oven and cool completely on cookie sheet.

In a medium mixing bowl, beat the cream cheese with 2 tablespoons of butter until smooth. Add the 1/3 cup sugar and beat again. Add whipping cream and beat on low speed until combined. Then beat on medium speed until soft peaks form. Gently fold in raspberry cake and pastry filling.

Remove meringues from parchment paper. Fill them with the raspberry cream filling. Cover loosely and chill 2-24 hours.

Before serving, drizzle plate with chocolate sauce or syrup. Place meringue cup on top and then add chocolate candy decoration, if desired.

You could also garnish with chocolate chips or fresh fruit.

Yields: about ten servings.

Sunday, January 22, 2012

Chocolate Raspberry Thumbprint Cookies

The original version of these cookies can be found here. I made a few changes based on the comments other bakers left. These are soft cookies that keep pretty well for several days if you store them in an airtight container.

Chocolate Raspberry Thumbprint Cookies

Ingredients:
2 cups flour
1 tsp. baking soda
1/4 tsp. salt
4 (1 oz.) squares of chocolate*
1/2 cup butter
8 oz. cream cheese, softened
1-1/4 cup sugar (divided)
1 egg
1 tsp. vanilla
1/3 cup red raspberry preserves**

*I used one square of semi-sweet chocolate and three squares of unsweetened chocolate. The original recipe called for all of them to be unsweetened. Many of the people who commented on the recipe said they used 2 semi-sweet and 2 unsweetened. I guess it depends on how sweet you like your chocolate. :)

**The original recipe called for jam, but the preserves seemed to hold up better.

Mix flour, baking soda, and salt. In large microwavable bowl, melt chocolate and butter for 2 minutes on high. Chocolate will hold most of its shape. Stir until smooth. Cube the softened cream cheese and stir into chocolate until melted. Stir in 1 cup of sugar, vanilla, and egg. Add flour mixture and combine thoroughly. Refrigerate at least fifteen minutes.

Heat oven to 375. Roll dough into 1-inch balls and then roll in remaining sugar to coat. Drop onto ungreased cookie sheet. Dip the end of a wooden spoon into sugar and depress in center of cookie to make a well for the preserves. (You can, of course, use your thumb for this, but the end of a wooden spoon makes a neater depression, which leads to less preserves spilling out the sides of the cookie.)

Fill each well with 1/4 teaspoon of preserves.

Bake 8-10 minutes. Cool one minute before transferring to wire rack.

Yields: about 4 dozen cookies.

Sunday, January 15, 2012

Chocolate Truffle Pie

I made this for a friend's party over the holidays. The dessert is very rich, so I suggest small pieces and add the Cool Whip topping. As with many of my recipes here, this one is from the Kraft website.

Chocolate Truffle Pie


Ingredients:
10 squares (1 oz. each) semi-sweet chocolate
1/2 cup whipping cream
4 eggs
1/2 cup sugar
1/4 cup flour
Cool Whip and powdered sugar (optional toppings)

Preheat oven to 325. Melt the chocolate and the whipping cream in a bowl in the microwave for 2 minutes. The chocolate will retain most of its shape, so stir it until it's thoroughly melted and smooth. Let it cool for a bit, and then whisk in the eggs, sugar, and flour.

Spray pie plate with cooking spray and pour in the batter. Bake for 35 minutes. Center of pie should still seem a little on the soft side. Cool.

If desired, sift powdered sugar over the top of the cooled pie. If you want a cool design, place a stencil down on the pie first. Sift the powdered sugar over it and then carefully lift the stencil from the pie. I made my own stencil by finding some fun paper snowflake templates on this website.

Don't forget to add the Cool Whip when you're ready to serve!

Yields: about 12 servings

Sunday, November 27, 2011

Homemade Butterfinger Bars with Only Three Ingredients

A friend told me about this recipe, so of course I looked it up online and it's all over the web. In case you haven't seen this yet, here's how to make your own Butterfinger Bars with only three ingredients.

This recipe is so good it literally got a round of applause at work.

Homemade Butterfinger Bars

Ingredients:
1 lb. bag of candy corn (about 2-1/2 cups)
1 small jar (16 oz.) of peanut butter
about 12 oz. of chocolate for melting (I used 12 1-oz. squares of Baker's semi-sweet chocolate, but you could also use chocolate chips or Wilton candy melts)

Line an 8x8 pan with parchment paper or waxed paper. (You can also use a 9 x 9 pan; your pieces will just end up thinner.)

In a medium-sized bowl, microwave the candy corn for one minute on high. Stir. Microwave another 30 seconds and stir again. Continue microwaving and stirring at 30 second intervals until thoroughly melted. (This should take a total of 2-3 minutes.)

Immediately add the peanut butter and stir until smooth. Turn into prepared pan and press smooth with rubber spatula. (Do this quickly because it hardens fairly fast. Do not be tempted to lick the bowl--it's hot!)

Let cool for an hour or two. Remove from pan and set on cutting board. Cut into small pieces.


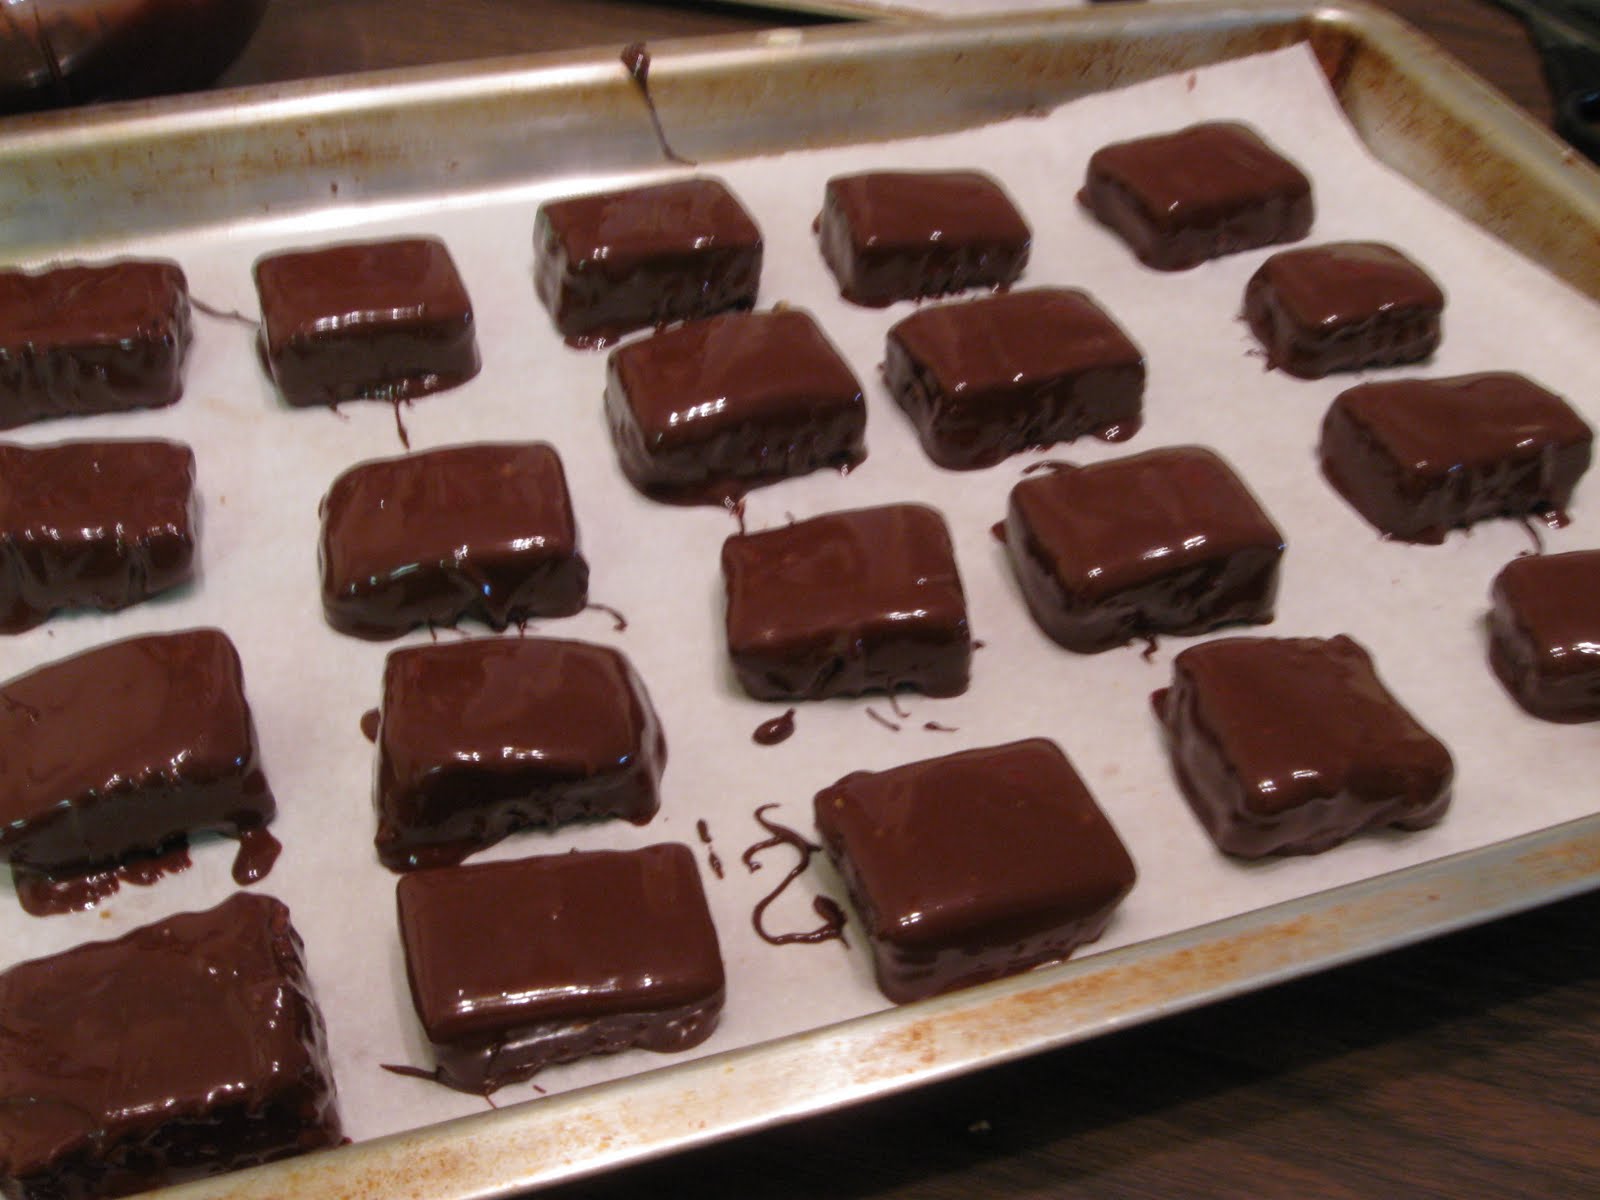
In a small bowl, microwave the chocolate until melted. Use the same technique as you used for the candy corn (one minute on high; stir; 30 seconds; stir). Use a fork to dip the candy corn/peanut butter pieces into the melted chocolate.
Let harden on sheet lined with parchment paper or waxed paper. Once chocolate cools and hardens, store in airtight container.

Sunday, November 6, 2011

Mudslide Cookies


A friend gave me a recipe box called Chocolate Bliss (Music Cooks) as a gift. Inside are ten recipe cards and a music CD to play while you are making or enjoying the recipes.

I made only one minor change to this recipe. I used milk chocolate chips instead of the semisweet ones in the original recipe. If you are a huge chocolate fan, you will love these cookies because they are what the name implies: a whole mudslide full of chocolate.

P.S. If you want more recipes like this, you can buy the Chocolate Bliss recipe box online at Barnes and Noble or Amazon.


Mudslide Cookies

Ingredients:
1/2 cup flour
2 teaspoons baking powder
1/4 teaspoon salt
4 tablespoons unsalted butter
3 ounces unsweetened chocolate
4 ounces bittersweet chocolate
3 eggs
1 cup sugar
1 teaspoon vanilla
1 cup chopped walnuts
3/4 cup milk chocolate chips

Preheat oven to 350 degrees and line a baking sheet with parchment paper.

In a small bowl, mix together the flour, baking powder, and salt.

In a microwave-safe bowl, melt the butter, the unsweetened chocolate, and the bittersweet chocolate. It is best to cut the chocolate into smaller pieces (I cut the 1-ounce squares in half) and then melt them on high for 30 seconds. Stir and melt again for another 30 seconds. Stir again. If they are still some unmelted chocolate pieces, continue cooking and stirring every 30 seconds.

In a large bowl, beat the eggs and the sugar on high for 3 minutes. The mixture should become pale and somewhat fluffy. Add the chocolate mixture and the vanilla. Beat on medium speed for one minute. Gradually add flour mixture and beat until just blended. Stir in walnuts and chocolate chips.

Use a small cookie scooper to drop batter onto prepared cookie sheet. The batter will be rather runny so don't expect perfectly rounded scoops of dough.

Bake for 12-14 minutes. Let cool on pan for 5 minutes, then transfer to wire rack.

Yields: about 36 cookies.

Sunday, September 18, 2011

Black Forest Gateau

When I saw this recipe in a cookbook, I had to look up the word "gateau." (French words and I just don't get along.) It turns out that "gateau" simply means "fancy cake." I guess that's fitting for this cake.

I love black forest cake, and someday I'll have to post my high school German teacher's super easy recipe for black forest cake. (It's truly a cake, and not a fancy "gateau.")

Here is my version of the Black Forest Gateau.

Black Forest Gateau

Ingredients:
5 eggs
1 cup sugar
1/2 cup flour
1/2 cup cocoa
6 tablespoons butter, melted
15-ounce can of dark sweet cherries, pitted
2-1/2 cups heavy cream
2 tablespoons powdered sugar
4 tablespoons kirsch/cherry brandy (optional)
a few maraschino cherries with stems (optional)
chocolate sprinkles (optional)

Cut a piece of wax paper into 2 circles to match the bottom of two 8-inch cake pans. Place a wax paper circle on the bottom of each pan and then spray the pans with cooking spray.

Preheat the oven to 350 degrees.

In a mixer bowl, beat together the eggs and sugar for 10 minutes. Mixture should become thick and pale. Sift together the flour and cocoa. Fold gently into egg and sugar mixture. Melt the butter and fold in gradually.

Pour batter into cake pans. Bake for 30 minutes. Cake should spring back when touched lightly. Cool for 5 minutes and then turn onto wire rack. Peel off wax paper.

While cake is cooling, drain and chop cherries. Whip cream until soft peaks form. Add powdered sugar and incorporate into whipped cream. Take two-thirds of the cream and mix with chopped cherries.

Split each cooled cake horizontally. (If desired, you can sprinkle each layer with a tablespoon of cherry brandy.) Place one layer on cake plate. Spread one-third of cherry whipped cream on top. Place another layer on top. Spread with cherry whipped cream. Repeat one more time and then place finally layer on top.

Use reserved whipped cream to frost cake.

To achieve the decorated version in my photo. Place some of the plain whipped cream in a decorating bag with a star tip and make rosettes along the top and stars along the bottom. Drop chocolate sprinkles inside circle of rosettes. Make three large rosettes in center of cake and place a maraschino cherry in each rosette. Sift powdered sugar over top for frosted look.


Yields: about 16 servings

Thursday, June 23, 2011

Cookies and Cream Dessert

Confession: I think I've become addicted to the Kraft food website. That's where I found the recipe for this dessert. They call it "Cookies and Cream Freeze."

This is the second dessert I made while down in Atlanta. The original recipe called for a loaf pan. Since we didn't have one down there, I improvised a smidge so that I could use a lovely white bowl my sister-in-law had. The base of the bowl was a square perfectly sized to fit 9 Oreos. I think you could use whatever size pan or bowl you'd like, just make sure you adjust the proportions accordingly and remember that the bottom of this dessert will become the top since it gets flipped upside-down before you serve it.

Cookies and Cream Dessert

Ingredients:
about 14-20 Oreos
8 oz. cream cheese, softened
1/4 cup sugar
1/2 tsp. vanilla
1 tub (8 0z.) Cool Whip, thawed
4 oz. semi-sweet chocolate

Line your pan with foil. Leave enough to hang over the edges. Then put one layer of Oreo cookies on the bottom. As you can see from the finished product, I made 3 rows of 3 cookies each because that's what fit this bowl. If you use a loaf pan, you'll probably use 4 rows of 2 cookies each.

In a mixer, beat cream cheese, sugar, and vanilla. Fold in Cool Whip. Take out 1-1/2 cups of the cream cheese mixture and reserve it in another bowl for the chocolate layer.

Spread remaining cream cheese mixture over top of Oreos as shown in picture to the right.

Crumble 8-12 Oreos and sprinkle over cream cheese mixture. (The original recipe called for only 6 Oreos, but I think I could have used a bit more cookie in my dessert!) Press down lightly so that cookie crumbs sink slightly into cream cheese.

Melt the four ounces of chocolate and stir into the reserved 1-1/2 cups cream cheese mixture. Spread over cookie crumb layer.

Freeze for at least 3 hours.

Remove from freezer 10-15 minutes before serving. Invert onto serving plate and remove foil.

Serves 8-10.

Thursday, June 16, 2011

Mississippi Mud Cake

While down in Atlanta, my sister-in-law came in the house after picking up the mail and called to me, "I have something for you!" It was a recipe card she had received free in the mail from Southern Living magazine. After a trip to the grocery store the next day, we had the goods to make this very sweet treat.

We decided it was more of a brownie than a "cake." :)

Mississippi Mud Cake

Ingredients:
1 cup chopped pecans
1 cup butter
4 oz. semisweet chocolate baking bar, chopped
2 cups sugar
1 1/2 cups flour
1/2 cup unsweetened cocoa
4 large eggs
1 tsp vanilla
3/4 tsp salt
1 10.5 oz. Bag miniature marshmallows

Place pecans in a single layer on a baking sheet. Bake at 350 for 8-10 min or until toasted.

In a large bowl, microwave butter and chopped chocolate for 1 min, stirring every 30 seconds or until melted and smooth. Stir in sugar, flour, cocoa, eggs, vanilla, and salt. Pour into greased jelly roll pan.

Bake at 350 for 20 min. Remove from oven, and sprinkle evenly with marshmallows. Bake 8-10 more minutes or until golden brown. (Note: It will seem like too many marshmallows, but go ahead and put on the whole bag. I mistakenly only put on some of the bag. They did cover the cake as seen in the picture below, but afterward my sister-in-law and I agreed that it could have used more marshmallow.)
While the marshmallow layer is baking, you can make the chocolate frosting.

For that, you'll need the following:
1/2 cup butter
1/2 cup cocoa
1/3 milk
1 16 oz. package powdered sugar
1 tsp. vanilla

Stir together first three ingredients in medium saucepan over medium heat until butter is melted. Cook, stirring constantly, for two minutes. Remove from heat. Beat in powdered sugar and vanilla.

Drizzle frosting over warm cake. (You may have more than you really need. Save the rest for some other cookies.) Sprinkle with toasted pecans.

This dessert makes enough to serve at least 16 people.

Thursday, June 9, 2011

Fudge Butterscotch Cake

This recipe is a variation of the Betty Crocker poke cakes. You can find many poke cake recipes here.

Fudge Butterscotch Cake

Ingredients:
1 German chocolate cake mix (plus eggs, oil, and water as specified by recipe on box)
1 can sweetened condensed milk
1 jar of fudge sundae topping
1 tub of Cool Whip, thawed
1 cup butterscotch chips

Bake the German chocolate cake in a 9x13 pan as directed on box. Allow to cool for twenty minutes. Then poke top of cake with end of wooden spoon. Holes should be about 1 inch apart.

Pour sweetened condensed milk over top of cake. Allow to soak in. Heat fudge topping and drizzle over top of cake. Refrigerate cake for two hours.

Spread thawed Cool Whip on top of cake and then sprinkle with butterscotch chips.

Saturday, April 9, 2011

Chocolate Banana Cream Pie

What do you do when your pie shell cracks? Toss it away? No way!

When I had a pie shell crack on me recently, I decided to use it for a cream pie, something that wouldn't soak through a crack in my crust. I knew pudding mixes could be used to make pies, so I checked out what was in my cabinet and whipped up this little treat.

Chocolate Banana Cream Pie

Ingredients:
1 small box of chocolate fudge pudding
1 small box of banana cream pudding
3 1/2 cups cold milk, divided
1 baked pie shell
a few chocolate chips (optional)


In a small bowl, combine a small box of chocolate fudge pudding with 1 3/4 cups cold milk. Whisk for five minutes, then pour into baked pie crust. Refrigerate for an hour.


In another small bowl, combined the small box of banana cream pudding with the other 1 3/4 cups cold milk. Again, whisk for five minutes. Pour on top of chilled chocolate pudding and smooth evenly. Refrigerate for at least another hour or two.

When it's time to serve, sprinkle a few chocolate chips on top for decoration.

Sunday, March 13, 2011

Kiss the Blarney Stone Cookies

I know many people are holding St. Patrick Day parties this weekend, so my post may be a smidge late for them. However, if you're celebrating on the real St. Patrick's Day, here's a fun, chocolaty cookie I found at allrecipes.com. It comes from the Hershey's people.

Kiss the Blarney Stone Cookies

Ingredients:
1 cup butter, softened
1 cup sugar
1 egg
1 teaspoon vanilla
1 3/4 cup flour
1/2 baking cocoa
1 1/2 teaspoons baking powder
1/2 teaspoon salt
about 36 Hershey's Kisses

Ingredients for glaze:
3/4 cup powdered sugar
3 1/2 teaspoons milk
1/4 teaspoon vanilla
3 drops of green food coloring

Beat together the butter, sugar, egg, and vanilla. In a medium bowl, combine the flour, cocoa, baking powder and salt. Gradually add the dry mixture to the butter mixture, beating until thoroughly blended.

Divide dough in half. Place each half on a piece of waxed paper and shape into a log with square sides. You can make the log any size you want. The original recipe suggested 7 inches long and 2 1/4 inches wide. Wrap the logs in the wax paper and refrigerate until firm, at least 8 hours.

Heat oven to 325 degrees. Cut logs into 3/8 inch slices and place onto ungreased cookie sheet.

Bake 15 minutes. Cool for 1-2 minutes and then remove to wire rack to cool completely.

Stir together powdered sugar, milk, 3/4 teaspoon vanilla, and green food coloring. Using a small round tip (like #3), drizzle the glaze over the top of the cookies. Place an unwrapped Hershey's kiss on top.

Yields: about 3 dozen cookies, depending on size

Sunday, February 13, 2011

Chocolate and Peanut Butter Heart Cookies

Looking for a last minute cookie to make for someone you love this Valentine's Day? Grab a heart-shaped cookie cutter (I got mine at Target) and have some fun!

The idea for this cookie came from a friend of mine who's been asking me to make them for ages. He didn't have a recipe for me to follow, just a description for a cookie that someone else used to make for him: a peanut-butter heart-shaped cookie half dipped in chocolate.

I couldn't find anything like this online so I made up my own recipe. When I gave him some to try, he said I got it right--yippee!


Chocolate and Peanut Butter Heart Cookies

Ingredients:
1/2 cup (1 stick) butter, softened
3/4 cup peanut butter
1/2 cup granulated sugar
1/2 cup brown sugar
1 egg
1 teaspoon vanilla
1 1/2 cups flour
1 teaspoon baking powder
1/4 teaspoon salt
6 squares of semi-sweet baking chocolate

Beat together the butter, peanut butter, and both sugars until creamy. Add the egg and vanilla and beat again.

Sift together the flour, baking powder, and salt. Add the flour mixture to the peanut butter mixture one cup at a time and beat again. The dough should be pretty thick.

(I put the dough in the refrigerator for an hour before rolling it out, but I don't know if that was really necessary.)

Roll out half the dough at a time. If it crumbles, you may need to kneed it in your hand for thirty seconds first. When the dough is rolled out to 1/8 inch, use heart-shaped cookie cutters to cut them out. Place on cookie sheet lined with parchment paper. Bake at 375 for 9 minutes. Remove immediately to cooling racks.

When cookies have cooled completely, melt three of the chocolate squares in the microwave. (Follow package directions) Dip half the cookie into the melted chocolate and let dry on waxed paper. When you've run out of chocolate, melt the three remaining squares and continue dipping the cookies.

My cookie cutter set came with four different sizes. I used the smallest two and ended up with about 40 cookies.

Sunday, January 23, 2011

Chocolate Layer Loaf Cake

The inspiration for this came from the Kraft foods website. The original recipe was for a cake roll. However, when I attempted it, I ended up with a mess that fell apart in my hands.

Now if you’ve followed my blog since last October, you know I’ve made one cake roll before (the Pumpkin Cake Roll), and that one turned out great. So when I had difficulty with this one, I went to the online reviews for the Kraft Chocolate Cake Roll. Although a lot of people said it tasted great, they also had problems rolling it.

So for attempt #2, I decided to forget rolling the cake. Instead, I layered it into a very yummy, chocolatey, loaf cake.

Chocolate Layer Loaf Cake


Ingredients:
6 squares semi-sweet chocolate
6 tablespoons butter
1 cup white sugar
4 eggs
1 cup flour, divided
1/2 teaspoon baking soda
2/3 cup water
4 oz. cream cheese, softened
3/4 cup powdered sugar, divided
3 cups of Cool Whip, thawed (You'll need to buy two tubs.)

Preheat oven to 350 degrees.
Spray a jelly roll pan (10 x 15) with cooking spray. Line the pan with waxed paper, and then spray it again.

Microwave three of the chocolate squares and the 6 tablespoons of butter in a medium bowl for 1½ minutes. Butter should be melted. Stir until chocolate is also melted and well blended. Add white sugar and mix until no lumps remain.

In large bowl, beat the four eggs about 3-4 minutes on high speed until thickened. (I recommend really making sure you have the eggs thickened before proceeding.) Beat in the chocolate mixture.

Add the baking soda and ¼ cup of the flour. Stir until thoroughly mixed. Then alternate adding in some of the water with the rest of the flour. Beat well after each addition. Spread evenly into prepared jelly roll pan.

Bake for 15-17 minutes or until cake springs back when touched lightly.

As soon as you’ve removed it from the oven, sprinkle it with ¼ cup of the powdered sugar. Place a piece of nonstick aluminum foil over the pan and immediately invert onto a cooling rack. Remove the pan and slowly peel off the wax paper. Allow cake to cool completely.

When the cake is cooled, cut into three equal pieces (about 10 x 5 inches).

In a medium bowl, beat the cream cheese and the remaining ½ cup of powdered sugar. Gently fold in 1½ cups Cool Whip.

Place one slice of cake onto your cake plate. Spread one half of cream cheese mixture evenly onto cake. Place second slice on top. Spread remaining filling on this layer. Set final cake piece on top.

In medium bowl, microwave remaining three chocolate squares about 1½ minutes on high. Stir until chocolate is completely melted. Fold in 1½ cups Cool Whip until thoroughly blended. Frost top and sides of cake evenly.