Happy 2011, everyone!
I'll be back in a day or two to show you how my King Cake turned out for New Year's Eve. Here's to a happy, healthy, and delicious 2011!
Friday, December 31, 2010
Sunday, December 26, 2010
Eggnog Cream Cups
This recipe came from a friend, who doesn't remember where she got it from. If you like eggnog as a drink, you will definitely like it as a cookie!

Ingredients for “cookie cups”:
1 cup flour
1/3 cup sugar
¼ teaspoon salt
¼ teaspoon ground nutmeg
½ cup (1 stick) butter, softened
Ingredients for filling:
¾ cup cold whipping cream
3 tablespoons sugar
3 tablespoons egg substitute
¼ teaspoon ground nutmeg
¼ teaspoon rum extract
Lightly grease 24 mini muffin cups with cooking spray.
Combine flour, ½ cup sugar, salt and ¼ teaspoon nutmeg in large bowl. Add butter and beat with electric mixer on medium speed until mixture resembles coarse crumbs.
 Scoop and roll dough into 1-inch balls. Press into bottoms of muffin cups (I used a shot glass for this). Then press up the sides of the muffin cups. Refrigerate 15 minutes. Preheat oven to 350 degrees.
 Bake cups 13-15 minutes or until golden brown. Cool in pans on wire racks 10 minutes before removing to wire racks.
For the filling, beat cream and 3 tablespoons sugar in another large bowl with electric mixer at high speed until soft peaks form.
Add egg substitute, ¼ teaspoon nutmeg, and rum extract. Beat until stiff peaks form. Do not overbeat. Refrigerate until ready to serve.
When you’re ready to serve, pipe or spoon the filling into each cup. Sprinkle with extra nutmeg. Yields: 24 cookies

Eggnog Cups
Ingredients for “cookie cups”:
1 cup flour
1/3 cup sugar
¼ teaspoon salt
¼ teaspoon ground nutmeg
½ cup (1 stick) butter, softened
Ingredients for filling:
¾ cup cold whipping cream
3 tablespoons sugar
3 tablespoons egg substitute
¼ teaspoon ground nutmeg
¼ teaspoon rum extract
Lightly grease 24 mini muffin cups with cooking spray.
Combine flour, ½ cup sugar, salt and ¼ teaspoon nutmeg in large bowl. Add butter and beat with electric mixer on medium speed until mixture resembles coarse crumbs.
 Scoop and roll dough into 1-inch balls. Press into bottoms of muffin cups (I used a shot glass for this). Then press up the sides of the muffin cups. Refrigerate 15 minutes. Preheat oven to 350 degrees.
 Bake cups 13-15 minutes or until golden brown. Cool in pans on wire racks 10 minutes before removing to wire racks.
For the filling, beat cream and 3 tablespoons sugar in another large bowl with electric mixer at high speed until soft peaks form.
Add egg substitute, ¼ teaspoon nutmeg, and rum extract. Beat until stiff peaks form. Do not overbeat. Refrigerate until ready to serve.
When you’re ready to serve, pipe or spoon the filling into each cup. Sprinkle with extra nutmeg.
 Yields: 24 cookies
Wednesday, December 22, 2010
Mom's Rum Balls
Everyone who celebrates Christmas probably has a cookie that makes them feel like the season has really arrived. For me, my mom's rum balls are one of those cookies (I actually have several cookies that scream, "Christmas!" to me).
Warning: these cookies will make your hands very messy. I remember the first time I helped my mom make them. I couldn't believe how icky my hands got as I rolled the balls. "You mean, this is how they're made?!?" I'm surprised I ever ate them again after that. :)

Ingredients:
1 cup pecan chips*
1 package of vanilla wafers
1 cup powdered sugar, sifted
1 tablespoon cocoa
1/8 teaspoon salt
1/3 cup light corn syrup
3 tablespoons rum
1 teaspoon vanilla
sifted powdered sugar for rolling balls
*If you can’t find pecan chips in your store, buy any other type of pecans (e.g. halves) and chop them until you have 1 to 1-1/2 cups finely chopped pecans.
Break the vanilla wafers into smaller pieces and drop them into a blender—about eight cookies at a time. Chop them in the blender until they are very fine, like graham crackers crushed for a graham cracker crust.
 Continue crushing vanilla wafers until you have 1 ¾ cups crumbs. You’ll use a little more than half the package of wafers. Turn the cookie crumbs into a bowl with the pecan chips.
Add powdered sugar, cocoa, and salt. Mix well with pastry blender.
Add syrup, rum, and vanilla. Mix well. Put bowl in freezer for 5-10 minutes to make rolling easier.
 Roll the balls using a tablespoon or a small cookie scooper to measure out the dough. Roll balls in powdered sugar. Let rum balls dry several hours before storing in air-tight container in refrigerator.
To keep hands from become too messy, try using powdered sugar on the palms of your hands while rolling.
Yields: about 40 rum balls

Warning: these cookies will make your hands very messy. I remember the first time I helped my mom make them. I couldn't believe how icky my hands got as I rolled the balls. "You mean, this is how they're made?!?" I'm surprised I ever ate them again after that. :)

Mom’s Rum Balls
Ingredients:
1 cup pecan chips*
1 package of vanilla wafers
1 cup powdered sugar, sifted
1 tablespoon cocoa
1/8 teaspoon salt
1/3 cup light corn syrup
3 tablespoons rum
1 teaspoon vanilla
sifted powdered sugar for rolling balls
*If you can’t find pecan chips in your store, buy any other type of pecans (e.g. halves) and chop them until you have 1 to 1-1/2 cups finely chopped pecans.
Break the vanilla wafers into smaller pieces and drop them into a blender—about eight cookies at a time. Chop them in the blender until they are very fine, like graham crackers crushed for a graham cracker crust.
 Continue crushing vanilla wafers until you have 1 ¾ cups crumbs. You’ll use a little more than half the package of wafers. Turn the cookie crumbs into a bowl with the pecan chips.
Add powdered sugar, cocoa, and salt. Mix well with pastry blender.
Add syrup, rum, and vanilla. Mix well. Put bowl in freezer for 5-10 minutes to make rolling easier.
 Roll the balls using a tablespoon or a small cookie scooper to measure out the dough. Roll balls in powdered sugar. Let rum balls dry several hours before storing in air-tight container in refrigerator.
To keep hands from become too messy, try using powdered sugar on the palms of your hands while rolling.
Yields: about 40 rum balls

Monday, December 20, 2010
Holiday Rice Krispie Treats
Looking for a really fast, really easy Christmas treat? Here's an easy way to "holidayize" your rice krispie treats.
 Holiday Rice Krispie Treats
I won't even bother putting the whole rice krispie treat recipe on here since you can find it on every box of Rice Krispies, not to mention most marshmallow packages.
Here's how to "dress them up." First, cut up some red and green maraschino cherries into quarters. I found the green ones at Target.
 Then make the treats as usual. As soon as you've pressed them into a greased pan (I think I used a 9 x 13 pan), press one red cherry quarter and one green cherry quarter together into the treat before it cools. Do this every two inches or so, depending on how big you want your treats to be.
Once the treats have cooled completely, cut them up so that the cherries are at the center of each piece. Immediately store them in an airtight container if you don't want them to dry out. I've also found that using a little more butter and marshmallow than the recipe actually requires also helps keep them moist.
If you want to dress up your presentation of the treats, use muffin cup liners like I did in the photo above. Enjoy!
Sunday, December 19, 2010
Cucidati (Italian Christmas Cookies)
I learned how to make these cookies by taking an Italian Christmas Cookies class. The instructor was named Dora, and her website can be found by clicking here. She was born in Italy and now teaches many different Italian cooking classes in my area.
Dora explained that the filling is different in each region of Italy, so I decided to play around with the filling recipe she gave us to come up with my own. I actually left out the figs, which are generally the main ingredient in the filling. Below is what I came up with for the filling, but I also tried using the fruit varieties of Solo Baking and Pastry Filling, and those worked out as well. I guess the moral of the story is: Try whatever filling you'd like.
Still more Christmas Cookie recipes to come this week. Tomorrow I'll post a quick way to "dress up" your Rice Krispie Treats for the holidays. Then on Wednesday or Thursday I'll post my mom's rum ball recipe. Finally, I've got a recipe for Eggnog Cups, a delicious little cream-filled cookie if you like the drink. I'll post those next Sunday, in plenty of time for New Year's Eve.
 Cucidati
(Italian Christmas Cookies)
Ingredients for dough:
2 cups flour
¾ tablespoons baking powder
1/8 teaspoon salt
¼ cup sugar
½ vegetable shortening
2 large eggs
½ tablespoon vanilla extract
¼ milk (add more if needed)
Ingredients for filling (my version):
12 ½ oz. can of dates with walnuts (Solo brand)
¾ cup raisins
1 tablespoon orange juice
2 tablespoons rum
Ingredients for icing:
1 cup powdered sugar
½ teaspoon vanilla extract
2 tablespoons milk
For the dough, add all ingredients to a mixer and mix for three full minutes. Dough will be soft.
Remove dough from mixer and knead by hand for five minutes. (I had to flour my hands several times during this process to keep the dough from sticking to me.)
Divide the dough into two equal pieces. Wrap each with plastic wrap and refrigerate for at least 45 minutes. Dough can be made ahead of time and stored for up to five days.
For the filling, stir all ingredients in a bowl. This can also be made ahead of time and stored in the fridge.
When you are ready to make the cookies, flour your working surface and roll out one section of the dough at a time until it is 1/8 inch thick. Spread a long row of filling about an inch for the edge of the dough. The picture below is with the raspberry Solo Baking & Pastry Filling.

Roll the edge of the dough over the filling. Cut the rest of the dough off. Then cut your “log” into slices and place on a cookie sheet covered with parchment paper.

Repeat this process until you have used up all of your dough and/or filling.

Bake for 12-15 minutes (mine seemed to take closer to 20) or until cookies are golden.
Remove from oven and transfer to wire rack to cool. Be sure they have completely cooled before icing.
For the icing, mix together all ingredients, add or subtracting milk to achieve the right consistency. Spread the icing on top of the cookies and decorate with sprinkles. Let icing set completely before storing in an airtight container.
Saturday, December 18, 2010
Red and Green Cherry Cheesecake Brownies
The red and green maraschino cherries in this cheesecake brownie make it a fun Christmas treat! I found them a little tricky to cut, so I think if I make them again, I might stick them in the freezer for ten minutes before cutting.
Whether or not they turn out a little messy, they are definitely delicious if you like cheesecake and brownies!
 Red and Green Cherry Cheesecake Brownies
Ingredients for crust:
4 ounces unsweetened baking chocolate, broken into pieces
1 cup (2 sticks) butter
2 cups sugar, divided
3 eggs
1 teaspoon vanilla
2 cups flour
Ingredients for cheesecake topping:
8 ounces cream cheese, softened
½ cup sugar
½ cup green and red maraschino cherries, chopped
½ teaspoons almond extract
Heat oven to 350 degrees. Grease 13 x 9 inch baking pan.
Place unsweetened baking chocolate and two sticks of butter in large microwave-safe bowl. Microwave at 50% power for 2-3 minutes, stirring after each minute, until mixture is smooth.
Beat in 2 cups sugar, 3 eggs, and 1 teaspoon vanilla until blended. Stir in 2 cups of flour. Spread batter in greased pan.
Beat cream cheese, ½ cup sugar, and 1 egg. Stir in red and green cherries and almond extract. Spread over top of chocolate batter in pan. Bake 35-40 minutes or just until set. Remove from oven. Cool completely in pan on wire rack. Cut into bars and cover. Refrigerate leftover bars.
Yields: 36 bars
Sunday, December 12, 2010
Peppermint Drops
Here's a fun Christmas cookie that will help you use up a few of those old candy canes you have lying around!
I developed this recipe by messing around with the Ricotta Cookies recipe and then changing the glaze on top. Enjoy!

I developed this recipe by messing around with the Ricotta Cookies recipe and then changing the glaze on top. Enjoy!

Peppermint Drops
Ingredients for cookie:
2 ¼ cups flour
1 teaspoon baking powder
½ teaspoon baking soda
1/8 teaspoon salt
½ cup butter, softened (1 stick)
1 cup granulated sugar
1 egg
1 cup ricotta cheese
¾ teaspoon peppermint extract
Ingredients for glaze:
1 ½ cups powdered sugar
2 tablespoons butter, softened
¼ teaspoon peppermint extract
2 tablespoons milk
2-3 drops red food color
about 10-12 mini candy canes, crushed (optional)
Preheat oven to 350 degrees. Spray cookie sheets with nonstick cooking spray.
In medium-sized bowl, whisk flour, baking powder, baking soda, and salt together. Set aside.
In a mixer, beat butter and sugar until blended. Add egg, ricotta cheese, and peppermint extract, beating until combined. On low speed, add flour mixture slowly.
Use a small cookie scooper to drop the dough onto cookie sheets.
Bake at 350 degrees for 12-14 minutes. Watch cookies carefully. They won’t brown on the top, but they should be lightly browned around the edges. After three minutes, remove to cooling racks. (Warning: bottoms can brown quickly without seeing much browning around the edges.)
 Let cookies cool for fifteen minutes before making glaze. While you are waiting, crush the candy canes with a rolling pin and put them in a small bowl.
Stir powdered sugar, butter, peppermint extract, milk, and red food color in a small bowl. Dip top of cookies into glaze and then crushed candy canes. Allow glaze to harden before storing.
Yields: about 60 cookies if you use a small cookie scooper.
Sunday, December 5, 2010
Cherry Chocolate Macaroons
Holiday cookies are on their way, and with the cherry red centers on these macaroons, this recipe could certainly join the party!
Many more holiday cookies to come this month!

1 bag (14 oz.) of sweetened coconut flakes
½ cup cocoa
1 can (14 oz.) sweetened condensed milk
1 teaspoon vanilla extract
1 teaspoon maraschino cherry juice
about 24 maraschino cherries, cut in half
Preheat oven to 350 degrees. Grease cookie sheet or spray it with Pam.
Stir together coconut and cocoa in a large bowl until the coconut is coated by the cocoa. Stir in sweetened condensed milk, vanilla extract, and cherry juice.
Drop by rounded teaspoons onto prepared cookie sheet. Shape with your fingers as necessary. Press cherry half onto center of each cookie.
Bake 8-10 minutes. Remove from cookie sheet immediately. Let cool completely on wire rack. Cookies can be stored loosely covered at room temperature.
Yields: about 48 cookies
Many more holiday cookies to come this month!

Cherry Chocolate Macaroons
1 bag (14 oz.) of sweetened coconut flakes
½ cup cocoa
1 can (14 oz.) sweetened condensed milk
1 teaspoon vanilla extract
1 teaspoon maraschino cherry juice
about 24 maraschino cherries, cut in half
Preheat oven to 350 degrees. Grease cookie sheet or spray it with Pam.
Stir together coconut and cocoa in a large bowl until the coconut is coated by the cocoa. Stir in sweetened condensed milk, vanilla extract, and cherry juice.
Drop by rounded teaspoons onto prepared cookie sheet. Shape with your fingers as necessary. Press cherry half onto center of each cookie.
Bake 8-10 minutes. Remove from cookie sheet immediately. Let cool completely on wire rack. Cookies can be stored loosely covered at room temperature.
Yields: about 48 cookies
Sunday, November 28, 2010
Perfect Pie Crust
I hope everyone had a good Thanksgiving! I've been in charge of making the pumpkin pie for my family's Thanksgiving feast for about eighteen years now. After years of practicing Mom's pie crust recipe, I think I've finally got it down.

Ingredients:
1 cup sifted flour
½ teaspoon salt
¼ cup vegetable oil
2 tablespoons cold milk
 Sift together flour and salt in medium-sized bowl. Pour oil and milk into measuring cup, but do not stir. Add oil and milk all at once to the flour mixture. Stir lightly with a fork. Form dough into a ball and flatten slightly.
 Roll between two 12-inch squares of waxed paper. (I find it helpful to dampen the surface of the table below the bottom sheet, so the paper won’t slip on me.) Roll spoke-fashion, going from center to edge of dough. When dough is rolled to edges, it will be the right thickness and size.
Peel off top sheet of paper and flip over onto pie plate. Remove last sheet of waxed paper slowly. Fit crust onto bottom and sides of pie plate.
Use handle of wooden spoon held in right hand and press between thumb and index finger of left hand, going around the edge of the pie plate.
For the pumpkin pie, that’s all I had to do! I used the recipe of the Libby pumpkin can for the filling.
If I were making a different kind of pie that required a baked pie crust, I would have needed to prick the bottom and sides of the crust with a fork dipped in flour before baking it at 450 degrees for 10-12 minutes.
For a double-crust pie, double the ingredients and roll out half at a time.

Perfect Pie Crust
Ingredients:
1 cup sifted flour
½ teaspoon salt
¼ cup vegetable oil
2 tablespoons cold milk
 Sift together flour and salt in medium-sized bowl. Pour oil and milk into measuring cup, but do not stir. Add oil and milk all at once to the flour mixture. Stir lightly with a fork. Form dough into a ball and flatten slightly.
 Roll between two 12-inch squares of waxed paper. (I find it helpful to dampen the surface of the table below the bottom sheet, so the paper won’t slip on me.) Roll spoke-fashion, going from center to edge of dough. When dough is rolled to edges, it will be the right thickness and size.
Peel off top sheet of paper and flip over onto pie plate. Remove last sheet of waxed paper slowly. Fit crust onto bottom and sides of pie plate.

Use handle of wooden spoon held in right hand and press between thumb and index finger of left hand, going around the edge of the pie plate.

For the pumpkin pie, that’s all I had to do! I used the recipe of the Libby pumpkin can for the filling.

If I were making a different kind of pie that required a baked pie crust, I would have needed to prick the bottom and sides of the crust with a fork dipped in flour before baking it at 450 degrees for 10-12 minutes.
For a double-crust pie, double the ingredients and roll out half at a time.
Sunday, November 21, 2010
Caramel Brownies
The students at one of my previous schools liked to call these “Speech Contest Brownies,” as I always brought them to the final round of the spring speech contest so that the finalists would have something to look forward to after they performed.
The recipe came from a guy who was in a class I was taking years ago. He brought these several times, and people begged him for the recipe. Here it is with a few of my personal hints for optimal enjoyment.

Ingredients:
1 ½ sticks margarine, melted
1 German chocolate cake mix with pudding
1 small can of evaporated milk
1 package of caramels (like the Kraft kind pictured below)
1 12-oz. package of chocolate chips

Unwrap all the caramels and put them in a small microwave-safe bowl. Then preheat oven to 350 degrees.
Melt the margarine in a microwave-safe bowl. Then add the cake mix and 1/3 cup evaporated milk (that’s about half of the small can). Spread ½ mixture in bottom of an ungreased 9 x 13 pan. You will have a very thin layer of batter, and you may want to use a buttered spatula to help spread it out.
Bake at 350 degrees for six minutes. Meanwhile, melt caramels and 1/3 cup evaporated milk (the other half of the small can).
After the six minutes are up, take the pan out of the oven and spread the chocolate chips over the cake. Then drizzle the melted caramel mixture on tops of this. Finally, drop the rest of the cake mixture by teaspoonfuls on top.
Bake another 15-18 minutes at 350 degrees. Let cool completely before attempting to cut them. I find it helpful to refrigerate them or even throw them in the freezer for 15 minutes before cutting them. That way the caramel mixture has a chance to solidify and they won’t be quite as messy to cut.
The recipe came from a guy who was in a class I was taking years ago. He brought these several times, and people begged him for the recipe. Here it is with a few of my personal hints for optimal enjoyment.

Caramel Brownies
Ingredients:
1 ½ sticks margarine, melted
1 German chocolate cake mix with pudding
1 small can of evaporated milk
1 package of caramels (like the Kraft kind pictured below)
1 12-oz. package of chocolate chips

Unwrap all the caramels and put them in a small microwave-safe bowl. Then preheat oven to 350 degrees.
Melt the margarine in a microwave-safe bowl. Then add the cake mix and 1/3 cup evaporated milk (that’s about half of the small can). Spread ½ mixture in bottom of an ungreased 9 x 13 pan. You will have a very thin layer of batter, and you may want to use a buttered spatula to help spread it out.

Bake at 350 degrees for six minutes. Meanwhile, melt caramels and 1/3 cup evaporated milk (the other half of the small can).
After the six minutes are up, take the pan out of the oven and spread the chocolate chips over the cake. Then drizzle the melted caramel mixture on tops of this. Finally, drop the rest of the cake mixture by teaspoonfuls on top.
Bake another 15-18 minutes at 350 degrees. Let cool completely before attempting to cut them. I find it helpful to refrigerate them or even throw them in the freezer for 15 minutes before cutting them. That way the caramel mixture has a chance to solidify and they won’t be quite as messy to cut.
Saturday, November 20, 2010
A Non-Baking Post
I hope you all don't mind a non-baking post, but I'd like to share some fun news and this blog seems as good a place as any. :)
I just had a short story accepted for publication in a kids' magazine! My story will appear in the April 2011 issue of Pockets magazine, a Christian publication for kids aged 6-12. You can find out more about them by visiting their website: http://pockets.upperroom.org/.
While out an a walk earlier today, I had a sudden realization about my story. Every short story in Pockets is accompanied by pictures--either artists' renderings or photographs of real people. Somebody is in charge of either finding photos or drawings to match my story! I wonder how the characters from my imagination will turn out when they make their publication debut. I don't know if soon-to-be thirteen-year-old twins Erik and Espy will turn out anything like I had in mind, but I'm eager to find out! Guess I'll have to wait until April.
By the way, the magazine is always looking for articles on "real children involved in environmental efforts, peacemaking, and helping others for our Kids with a Mission feature." (Quote taken from their website) If anyone knows any kids who deserve recognition for the good work they do, let me know. I'd love to do an article on them and submit it to Pockets.
Sunday, November 14, 2010
Smiley Face Cookies
This recipe originally came from the book Peach Cobbler Murder. The book was written by Joanne Fluke and is part of a series of cozy murder mysteries about a coffeeshop owner that shares her recipes as she solves the murder. If you’re not familiar with the term “cozy murder mystery,” just think of Agatha Christie’s Miss Marple or the TV show Murder She Wrote (as opposed to something “hard-boiled” like Law and Order or CSI). In fact, Joanne Fluke’s website is www.murdershebaked.com. Cute, huh?
In the book, the recipe is called Doll Face Cookies. I’ve changed it only slightly so that it makes fewer cookies and the faces actually smile. The original instructions call for three raisins (two eyes and a mouth). Instead of using a third raisin for a mouth, I replaced it with a quarter of a maraschino cherry. Now the faces can smile back at me. ☺ Besides, how can I pass up an excuse to use maraschino cherries?
Oh, and did I mention these cookies are egg-free?

Ingredients:
¼ cup melted butter (1/2 stick)
¼ cup molasses
½ cup tightly packed brown sugar
½ teaspoon baking soda
¼ teaspoon cinnamon
½ teaspoon lemon juice
¼ cup milk
1 ¼ cups flour
about 50 raisins
6-8 maraschino cherries (quartered)
Melt the butter in a large microwave-safe bowl. Let the butter cool to room temperature. Preheat the oven to 375 degrees.
Spray a measuring cup with nonstick cooking spray and measure out ¼ cup molasses. Add the molasses and the brown sugar to the melted butter. Next, stir in the baking soda, salt, cinnamon, and lemon juice.
Add the flour and milk slowly, mixing as you go. Stir until all ingredients are incorporated thoroughly.
Use a small cookie scooper or rounded teaspoons to drop dough onto an ungreased cookie sheet. Put two raisins on top for eyes and a quarter of a maraschino cherry for the mouth.
Bake for 10-12 minutes at 375 degrees. Let the cookies cool for two minutes on the sheet before transferring them to a wire rack to cool completely.
Yields: about two dozen
If I ever meet Joanne Fluke, I’d love to know how she gets these cookies off her cookie sheet. I must confess that I have problems doing it without the “face” getting stretched or pushed into another shape. Sometimes my cookies turn out more like Edvard Munch’s painting Scream.


And other times, they look more like Jack-o-lanterns.
Oh, well. They always taste yummy.
In the book, the recipe is called Doll Face Cookies. I’ve changed it only slightly so that it makes fewer cookies and the faces actually smile. The original instructions call for three raisins (two eyes and a mouth). Instead of using a third raisin for a mouth, I replaced it with a quarter of a maraschino cherry. Now the faces can smile back at me. ☺ Besides, how can I pass up an excuse to use maraschino cherries?
Oh, and did I mention these cookies are egg-free?

Smiley Face Cookies
Ingredients:
¼ cup melted butter (1/2 stick)
¼ cup molasses
½ cup tightly packed brown sugar
½ teaspoon baking soda
¼ teaspoon cinnamon
½ teaspoon lemon juice
¼ cup milk
1 ¼ cups flour
about 50 raisins
6-8 maraschino cherries (quartered)
Melt the butter in a large microwave-safe bowl. Let the butter cool to room temperature. Preheat the oven to 375 degrees.
Spray a measuring cup with nonstick cooking spray and measure out ¼ cup molasses. Add the molasses and the brown sugar to the melted butter. Next, stir in the baking soda, salt, cinnamon, and lemon juice.
Add the flour and milk slowly, mixing as you go. Stir until all ingredients are incorporated thoroughly.
Use a small cookie scooper or rounded teaspoons to drop dough onto an ungreased cookie sheet. Put two raisins on top for eyes and a quarter of a maraschino cherry for the mouth.
Bake for 10-12 minutes at 375 degrees. Let the cookies cool for two minutes on the sheet before transferring them to a wire rack to cool completely.
Yields: about two dozen
If I ever meet Joanne Fluke, I’d love to know how she gets these cookies off her cookie sheet. I must confess that I have problems doing it without the “face” getting stretched or pushed into another shape. Sometimes my cookies turn out more like Edvard Munch’s painting Scream.


And other times, they look more like Jack-o-lanterns.

Oh, well. They always taste yummy.
Sunday, November 7, 2010
Pumpkin Cake Roll
The last of the pumpkin recipes for this year! This recipe comes from Libby’s, too. One of my nephews described the taste as being like “a super awesome carrot cake.” True enough—it wasn’t overly pumpkin-y, and the cream cheese filling does evoke a carrot cake taste.
This was my first attempt at doing any kind of “roll cake,” but I think it turned our fairly well. I had a few problems with the cake sticking at times, but at least the cake didn’t have any major cracks in it. Since I’m used to regular cakes, it was weird to work with a cake that was so thin!

Cake Ingredients:
¾ cup flour
½ teaspoon baking powder
½ teaspoon baking soda
½ teaspoon ground cinnamon
½ teaspoon ground cloves
¼ teaspoon salt
3 large eggs
1 cup sugar
2/3 cup pumpkin
1 cup chopped walnuts (optional)
Preheat oven to 375 degrees. Grease 15 x 10-inch jelly roll pan. Line the pan with wax paper and then grease and flour the paper.
Sprinkle a thin, cotton kitchen towel with powdered sugar. I recommend not using a terry cloth towel that might leave fuzzies on your cake later. I also recommend being very liberal with your powdered sugar.
Combine flour, baking powder, baking soda, cinnamon, cloves, and salt in a small bowl. Beat eggs and sugar in a larger mixer bowl until thick. Beat in pumpkin. Stir in flour mixture. Spread evenly into prepared pan. It will be a very thin layer. Sprinkle with nuts, if desired. (I used only ½ cup of walnuts, even though the recipe suggested a full cup.)
Bake for 13-15 minutes or until top of cake springs back when touched. Immediately loosen and turn cake onto towel sprinkled with powdered sugar. Carefully peel off paper. Roll up cake and towel together, starting with narrow end. You might want to sprinkle with more powdered sugar as you roll the cake so that it doesn’t stick to either side of the kitchen towel. Cool on wire rack while you make the filling.
Ingredients for filling:
8 oz. cream cheese, softened
1 cup powdered sugar
6 tablespoons butter or margarine, softened
1 teaspoon vanilla extract
Beat cream cheese, powdered sugar, butter and vanilla extract in small mixer bowl until smooth. Carefully unroll cake; removed towel. Spread cream cheese mixture over cake, leaving an inch or so on the sides (this will give the filling a place to ooze when you reroll it). Reroll cake. Wrap in plastic wrap and refrigerate at least one hour. Sprinkle with powdered sugar before serving, if desired.
Note: Many people had posted online about how long they let the cake cool before filling it. I guess if you let it cool completely, it may crack when you try to roll it. I let the cake cool about twenty minutes. It was still quite warm when I went to fill it, but at least it rolled pretty nicely.
This was my first attempt at doing any kind of “roll cake,” but I think it turned our fairly well. I had a few problems with the cake sticking at times, but at least the cake didn’t have any major cracks in it. Since I’m used to regular cakes, it was weird to work with a cake that was so thin!

Pumpkin Cake Roll
Cake Ingredients:
¾ cup flour
½ teaspoon baking powder
½ teaspoon baking soda
½ teaspoon ground cinnamon
½ teaspoon ground cloves
¼ teaspoon salt
3 large eggs
1 cup sugar
2/3 cup pumpkin
1 cup chopped walnuts (optional)
Preheat oven to 375 degrees. Grease 15 x 10-inch jelly roll pan. Line the pan with wax paper and then grease and flour the paper.
Sprinkle a thin, cotton kitchen towel with powdered sugar. I recommend not using a terry cloth towel that might leave fuzzies on your cake later. I also recommend being very liberal with your powdered sugar.

Combine flour, baking powder, baking soda, cinnamon, cloves, and salt in a small bowl. Beat eggs and sugar in a larger mixer bowl until thick. Beat in pumpkin. Stir in flour mixture. Spread evenly into prepared pan. It will be a very thin layer. Sprinkle with nuts, if desired. (I used only ½ cup of walnuts, even though the recipe suggested a full cup.)
Bake for 13-15 minutes or until top of cake springs back when touched. Immediately loosen and turn cake onto towel sprinkled with powdered sugar. Carefully peel off paper. Roll up cake and towel together, starting with narrow end. You might want to sprinkle with more powdered sugar as you roll the cake so that it doesn’t stick to either side of the kitchen towel. Cool on wire rack while you make the filling.

Ingredients for filling:
8 oz. cream cheese, softened
1 cup powdered sugar
6 tablespoons butter or margarine, softened
1 teaspoon vanilla extract
Beat cream cheese, powdered sugar, butter and vanilla extract in small mixer bowl until smooth. Carefully unroll cake; removed towel. Spread cream cheese mixture over cake, leaving an inch or so on the sides (this will give the filling a place to ooze when you reroll it). Reroll cake. Wrap in plastic wrap and refrigerate at least one hour. Sprinkle with powdered sugar before serving, if desired.

Note: Many people had posted online about how long they let the cake cool before filling it. I guess if you let it cool completely, it may crack when you try to roll it. I let the cake cool about twenty minutes. It was still quite warm when I went to fill it, but at least it rolled pretty nicely.
Sunday, October 31, 2010
Iced Pumpkin Cookies
Happy Halloween!
I looked at many pumpkin cookie recipes online before settling on this one. I found many of them had comments by “reviewers” who tinkered with the recipe this way and that until my head was spinning about which way was best. All I wanted was a simple recipe for a great pumpkin cookie.
This one came straight from the Libby pumpkin people on the verybestbaking.com website. I didn’t mess with it at all, and I think the cookies turned out great.

Ingredients for cookies:
2 ½ cups flour
1 teaspoon baking soda
1 teaspoon baking powder
1 teaspoon ground cinnamon
½ teaspoon ground nutmeg
½ teaspoon salt
1 ½ cups sugar
½ cup butter (1 stick), softened
1 cup canned pumpkin
1 large egg
1 teaspoon vanilla extract
Preheat oven to 350 degrees. Grease baking sheets.
Combine flour, baking soda, baking powder, cinnamon, nutmeg, and salt in a medium bowl. Beat sugar and softened butter in large mixer bowl until blended. Then add the pumpkin, egg, and vanilla extract and beat until smooth.
 Gradually add in the flour mixture and beat until thoroughly mixed. Drop by rounded tablespoon (or my favorite—small cookie scoop) onto greased baking sheets.
Bake for 15-16 minutes or until edges are firm. Cool on baking sheets for two minutes before removing to wire racks.
Ingredients for glaze:
2 cups sifted powdered sugar
3 tablespoons milk
1 tablespoon melted butter
1 teaspoon vanilla
 Combine ingredients for glaze in a small bowl. Then drizzle over cookies. I snipped the end of a decorating bag to make the drizzling a little easier. I also put waxed paper under the cooling rack to catch any glaze that dripped.
Yields: about 3 dozen cookies
I looked at many pumpkin cookie recipes online before settling on this one. I found many of them had comments by “reviewers” who tinkered with the recipe this way and that until my head was spinning about which way was best. All I wanted was a simple recipe for a great pumpkin cookie.
This one came straight from the Libby pumpkin people on the verybestbaking.com website. I didn’t mess with it at all, and I think the cookies turned out great.

Iced Pumpkin Cookies
Ingredients for cookies:
2 ½ cups flour
1 teaspoon baking soda
1 teaspoon baking powder
1 teaspoon ground cinnamon
½ teaspoon ground nutmeg
½ teaspoon salt
1 ½ cups sugar
½ cup butter (1 stick), softened
1 cup canned pumpkin
1 large egg
1 teaspoon vanilla extract
Preheat oven to 350 degrees. Grease baking sheets.
Combine flour, baking soda, baking powder, cinnamon, nutmeg, and salt in a medium bowl. Beat sugar and softened butter in large mixer bowl until blended. Then add the pumpkin, egg, and vanilla extract and beat until smooth.
 Gradually add in the flour mixture and beat until thoroughly mixed. Drop by rounded tablespoon (or my favorite—small cookie scoop) onto greased baking sheets.
Bake for 15-16 minutes or until edges are firm. Cool on baking sheets for two minutes before removing to wire racks.
Ingredients for glaze:
2 cups sifted powdered sugar
3 tablespoons milk
1 tablespoon melted butter
1 teaspoon vanilla
 Combine ingredients for glaze in a small bowl. Then drizzle over cookies. I snipped the end of a decorating bag to make the drizzling a little easier. I also put waxed paper under the cooling rack to catch any glaze that dripped.
Yields: about 3 dozen cookies
Sunday, October 24, 2010
Pumpkin Loaf
One of my friends says that pumpkin is only to be served during the fall holidays (Halloween and Thanksgiving)--NOT at Christmas time! :) To honor her request, I will be bringing you three pumpkin recipes in a row.
This week it's Pumpkin Loaf, a really moist bread that makes your house smell great. In the next two weeks, I'll have pumpkin cookies and a pumpkin cake roll. So don't worry when you see this recipe uses only half a can of pumpkin. Save the rest for the cookies or the cake roll. :)

1 cup of canned pumpkin (this is a little more than half a 15-oz. can)
2 eggs
1/4 cup vegetable oil
1/4 cup applesauce (I used the kind already flavored with cinnamon)
1/4 teaspoon vanilla
1/2 cup brown sugar
1 cup white sugar
1 3/4 cup flour
1 teaspoon baking soda
3/4 teaspoon salt
1/2 teaspoon cinnamon
1/2 teaspoon nutmeg
1/4 teaspoon cloves
1/4 teaspoon ground ginger
Preheat oven to 350 degrees (325 degrees for dark-coated pans). Grease and flour a 9x5 inch loaf pan or line it with parchment paper.
In a large bowl, mix together pumpkin, eggs, oil, applesauce, vanilla, and both kinds of sugar.
In a separate bowl, whisk together the flour, baking soda, salt, cinnamon, nutmeg, cloves, and ginger. Stir the dry ingredients into the pumpkin mixture until blended. Pour into the prepared pan.
Bake for about 50 minutes. Loaf is done when toothpick inserted in center comes out clean.
This week it's Pumpkin Loaf, a really moist bread that makes your house smell great. In the next two weeks, I'll have pumpkin cookies and a pumpkin cake roll. So don't worry when you see this recipe uses only half a can of pumpkin. Save the rest for the cookies or the cake roll. :)

Pumpkin Loaf
Ingredients:1 cup of canned pumpkin (this is a little more than half a 15-oz. can)
2 eggs
1/4 cup vegetable oil
1/4 cup applesauce (I used the kind already flavored with cinnamon)
1/4 teaspoon vanilla
1/2 cup brown sugar
1 cup white sugar
1 3/4 cup flour
1 teaspoon baking soda
3/4 teaspoon salt
1/2 teaspoon cinnamon
1/2 teaspoon nutmeg
1/4 teaspoon cloves
1/4 teaspoon ground ginger
Preheat oven to 350 degrees (325 degrees for dark-coated pans). Grease and flour a 9x5 inch loaf pan or line it with parchment paper.
In a large bowl, mix together pumpkin, eggs, oil, applesauce, vanilla, and both kinds of sugar.
In a separate bowl, whisk together the flour, baking soda, salt, cinnamon, nutmeg, cloves, and ginger. Stir the dry ingredients into the pumpkin mixture until blended. Pour into the prepared pan.
Bake for about 50 minutes. Loaf is done when toothpick inserted in center comes out clean.
Sunday, October 17, 2010
Orange Dream Cupcake
I almost made these for Cattapalooza, but the chocolate cupcakes won out. :) This recipe was adapted from a full cake recipe. The frosting was the best part. With some dark chocolate decorations, these cupcakes could be really fun for Halloween.

Cake Ingredients:
1 yellow cake mix
1 (3 ounce) package vanilla instant pudding
¾ cup orange juice
½ cup vegetable oil
4 eggs
1 teaspoon vanilla extract
2 teaspoons orange zest
Preheat oven to 350. Line muffin pan with cupcake liners.
In a large mixing bowl, combine all ingredients for the cake. Beat on medium speed for two minutes. Scoop into muffin pan. Bake for 16-20 for full-size cupcakes. Bake for 10-13 minutes for mini cupcakes.
Icing Ingredients:
1 cup cold milk
1 small package vanilla instant pudding
2 teaspoons grated orange zest
2 cups Cool Whip
Whisk milk, pudding, and orange zest for two minutes. Fold in the Cool Whip.

Orange Dream Cupcakes
Cake Ingredients:
1 yellow cake mix
1 (3 ounce) package vanilla instant pudding
¾ cup orange juice
½ cup vegetable oil
4 eggs
1 teaspoon vanilla extract
2 teaspoons orange zest
Preheat oven to 350. Line muffin pan with cupcake liners.
In a large mixing bowl, combine all ingredients for the cake. Beat on medium speed for two minutes. Scoop into muffin pan. Bake for 16-20 for full-size cupcakes. Bake for 10-13 minutes for mini cupcakes.
Icing Ingredients:
1 cup cold milk
1 small package vanilla instant pudding
2 teaspoons grated orange zest
2 cups Cool Whip
Whisk milk, pudding, and orange zest for two minutes. Fold in the Cool Whip.
Wednesday, October 13, 2010
Chocolate Cool Whip Icing
This is the second recipe from "Cattapalooza." This icing made a really nice topping for the cupcakes. I put it in a decorating bag with a star tip and just made a rosette on top of each mini cupcake.
 Chocolate Cool Whip Icing
Ingredients:
1 small (3.9-ounce) package of chocolate instant pudding
3/4 cup milk
1 8-ounce container of Cool Whip, thawed
Mix the milk and pudding together. I ended up using the wire whisk on my mixer. Then fold in the Cool Whip. (I had a little problem with the pudding not blending well with the Cool Whip because the smaller amount of milk made the pudding thicker than typical, so I used the mixer with the wire whisk to really smooth out the icing.)
 The chocolate cross decorations were made with Wilton Candy Melts. I simply melted about 10 of the chocolate candy pieces in a decorating bag in the microwave. Then I snipped off the end and piped the crosses onto a sheet of parchment paper. An hour in the fridge was enough to harden them.
Tuesday, October 12, 2010
Mini No-Bake Cheesecakes
Due to "Cattapalooza" this past weekend, my entries for this week are a little late. On the bright side, I baked a lot, so I’ve got two recipes to share!
First up are these mini no-bake cheesecakes. I looked at a lot of recipes online before I decided on this one. It’s basically Martha Stewart’s recipe with the amounts adjusted to fill mini muffin tins versus a springform pan.
The good news about this cheesecake recipe is that it tastes great and contains no eggs. That bad news is that, like many other no-bake recipes, it didn’t get really firm, so it really needs to stay refrigerated until you’re ready to serve it.

Ingredients for crust:
1 package (10 sheets) graham crackers
5 ½ tablespoons unsalted butter, melted
1 tablespoon sugar
Ingredients for filling:
2 8-ounce packages cream cheese, room temperature
1 14-ounce can sweetened condensed milk
¼ cup fresh lemon juice
1 teaspoon vanilla extract
 Put the graham crackers in a resealable plastic bag. Crush them with a rolling pin until the crumbs are very fine. (When I got near the end, I used a sifter to help me find the larger crumbs that needed some more smashing.)
Pour the crumbs into a bowl. Stir in the sugar and melted butter. Press the crumbs into mini muffin cups. I used the end of a shot glass to help me press the crumbs down.
Chill the crust in the freezer for at least 10 minutes.
To make the filling, beat the cream cheese at a medium-high speed until smooth. Slowly beat in the condensed milk, scraping the bowl as necessary. Then beat in the lemon juice and vanilla.
Scoop the filling into the muffin tins and refrigerate at least 2 ½ to 3 hours.
Yields: about 40 mini cheesecakes
A few extra hints:
*Instead of using spoons or a cookie scooper to get the filling into the mini muffin tins, I put the filling in a decorating bag and just squeezed it right in.
*In the picture, you’ll notice that some of the mini cheesecakes have a pink topping. I added a Cherry Cool Whip topping just before the party. It was simply the “Strawberry Mousse Filling” with the cherry cake and pastry filling instead of strawberry.
First up are these mini no-bake cheesecakes. I looked at a lot of recipes online before I decided on this one. It’s basically Martha Stewart’s recipe with the amounts adjusted to fill mini muffin tins versus a springform pan.
The good news about this cheesecake recipe is that it tastes great and contains no eggs. That bad news is that, like many other no-bake recipes, it didn’t get really firm, so it really needs to stay refrigerated until you’re ready to serve it.

No-Bake Mini Cheesecakes
Ingredients for crust:
1 package (10 sheets) graham crackers
5 ½ tablespoons unsalted butter, melted
1 tablespoon sugar
Ingredients for filling:
2 8-ounce packages cream cheese, room temperature
1 14-ounce can sweetened condensed milk
¼ cup fresh lemon juice
1 teaspoon vanilla extract
 Put the graham crackers in a resealable plastic bag. Crush them with a rolling pin until the crumbs are very fine. (When I got near the end, I used a sifter to help me find the larger crumbs that needed some more smashing.)
Pour the crumbs into a bowl. Stir in the sugar and melted butter. Press the crumbs into mini muffin cups. I used the end of a shot glass to help me press the crumbs down.
Chill the crust in the freezer for at least 10 minutes.
To make the filling, beat the cream cheese at a medium-high speed until smooth. Slowly beat in the condensed milk, scraping the bowl as necessary. Then beat in the lemon juice and vanilla.
Scoop the filling into the muffin tins and refrigerate at least 2 ½ to 3 hours.
Yields: about 40 mini cheesecakes
A few extra hints:
*Instead of using spoons or a cookie scooper to get the filling into the mini muffin tins, I put the filling in a decorating bag and just squeezed it right in.
*In the picture, you’ll notice that some of the mini cheesecakes have a pink topping. I added a Cherry Cool Whip topping just before the party. It was simply the “Strawberry Mousse Filling” with the cherry cake and pastry filling instead of strawberry.
Sunday, October 3, 2010
Chocolate Buttercream Icing
I was originally going to use this post to talk about how to stack a cake, but I was so nervous about getting this cake done in time for the party that I forgot to take pictures as I went along!
Some of you have already heard of my "cake disaster" ☺ with this one. I accidentally picked up an older cake mix at the store. When I took the cake out of the pan, it started to fall apart. It wasn’t until after it was in pieces that I looked at the “Best by” date and realized this cake was past its prime by several months.
After a quick dash across the street to my local Target, I bought another cake mix and tried again. This one was definitely fresher than the last. I still had a few problems with some of the cake falling apart when I went to torte it, but I managed to salvage the cake in the end. I think I may have been trying to torte the cake a bit too soon because I was running so short on time.
Anyway, here’s the recipe for Chocolate Buttercream Icing.
 Chocolate Buttercream Icing
1 teaspoon vanilla extract
2 tablespoons water
1/2 cup solid vegetable shortening (e.g. Crisco)
1/2 cup butter
4 cups powdered sugar
2/3 cup cocoa powder
brown icing color (optional)
In a mixer, cream vanilla extract, shortening, butter, and water. Gradually add powdered sugar. Mix on medium speed until all ingredients have been thoroughly blended. Add cocoa powder a bit at a time. Keep mixing until smooth and creamy.

If you want the icing to look darker, add some brown icing color. I used an entire container of Wilton brown icing color to get the shade of brown in the photo to the right! The cocoa powder doesn’t make the icing very dark at all. It’s a very soft brown, and I wanted something that looked like chocolate!
Sunday, September 26, 2010
Carol's Apple Crisp
The title for this recipe may have some of you scratching your heads and thinking, "Who's Carol?" Well, the truth is, that I have no idea who Carol is!
The recipe came from a Pfaltzgraff calendar my mother gave me. Each month features a new recipe baked or served on some kind of Pfaltzgraff dish. "Carol's Apple Crisp" is the dish for September. It was quite a hit at Sunday dinner. Enjoy!

6-8 large Granny Smith apples, peeled and sliced
1 cup flour
1 cup sugar
1 teaspoon salt
1 teaspoon baking powder
1 egg
¼ cup butter, softened
cinnamon
Preheat oven to 350 degrees.
Sift flour, sugar, salt, and baking powder into bowl. Add 1 egg. Mix well until crumbly.
Place apples in 9 x 13 baking dish. Sprinkle crumbs over apples. Dot with butter and sprinkle with plenty of cinnamon. Bake at 350 for one hour.
The recipe came from a Pfaltzgraff calendar my mother gave me. Each month features a new recipe baked or served on some kind of Pfaltzgraff dish. "Carol's Apple Crisp" is the dish for September. It was quite a hit at Sunday dinner. Enjoy!

Carol's Apple Crisp
6-8 large Granny Smith apples, peeled and sliced
1 cup flour
1 cup sugar
1 teaspoon salt
1 teaspoon baking powder
1 egg
¼ cup butter, softened
cinnamon
Preheat oven to 350 degrees.
Sift flour, sugar, salt, and baking powder into bowl. Add 1 egg. Mix well until crumbly.
Place apples in 9 x 13 baking dish. Sprinkle crumbs over apples. Dot with butter and sprinkle with plenty of cinnamon. Bake at 350 for one hour.
Sunday, September 19, 2010
Apple Coconut Bars
Let's hear it for apple season! This recipe won't use up all your apples, but it is a nice way to usher in the fall season.
 Apple Coconut Bars
Ingredients:
½ cup melted butter (1 stick)
½ cup white sugar
1 cup brown sugar, firmly packed
½ teaspoon baking soda
½ teaspoon baking powder
½ teaspoon salt
1 teaspoon cinnamon
2 teaspoons vanilla
2 eggs
1 cup peeled and chopped apple (1 large Gala was enough)
2 cups flaked coconut
½ cup rolled oats
1 ½ cups flour
Preheat oven to 375 degrees. Grease a 9 x 13 pan.
Melt the butter in a large microwave-safe bowl. Add the white and brown sugars. Mix in the baking soda, baking powder, salt, cinnamon, and vanilla.
In a small bowl, beat the two eggs with a fork. Then add them to the rest of the cookie dough. Mix well. Then add the chopped apple and 1 ½ cups of the coconut. (Keep ½ cup for later.)
Add the oats and flour. Mix everything thoroughly.
Spoon the dough into the greased pan. Sprinkle the remaining coconut on top. Bake at 375 degrees for 25 to 30 minutes. The top should brown slightly.
Let cool and then cut into bars.
Saturday, September 18, 2010
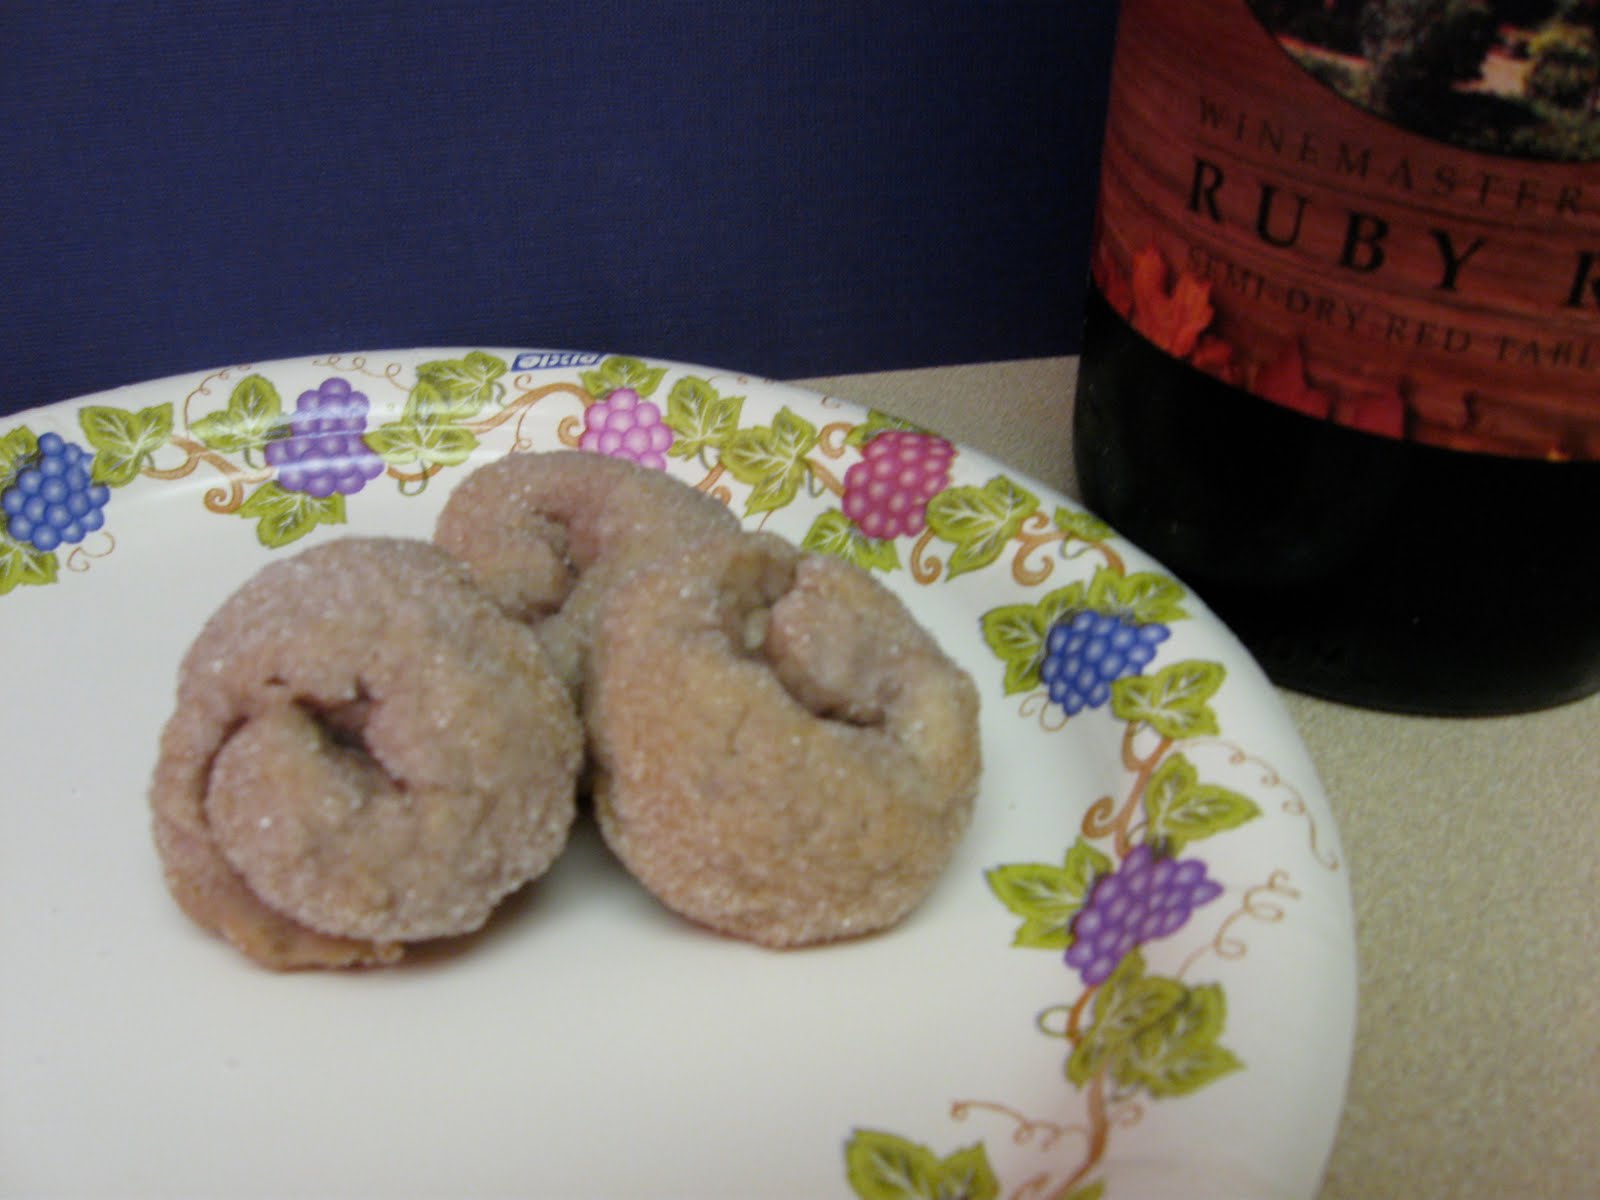
Italian Wine Cookies
I almost didn't post this recipe since I wasn't overly thrilled with the results. My niece and nephews were willing to eat the cookies even though they weren't particularly sweet. The recipe came from allrecipes.com.
 Italian Wine Cookies
Ingredients:
3 cups all-purpose flour
1 teaspoon baking powder
3 tablespoons white sugar
1 cup dry red wine (I used a semi-dry red wine.)
½ cup vegetable oil
1/3 cup granulated sugar for decoration
Preheat oven to 350 degrees F. Spray your cookie sheet with cooking spray.
In a large bowl combine the flour, baking powder and sugar. Add the wine and oil. Mix with a large fork and then with your hands.
Roll small pieces of dough between hands to make "logs" then shape into circles. The circles should be no bigger than the 2 inches in diameter. Roll top of cookies in extra sugar and place on cookie sheet.
Bake at 350 degrees F for 25 minutes or until slightly brown. After cookies cool they should be hard and crisp.
Sunday, September 12, 2010
Chocolate Ganache
I needed some frosting for some cupcakes, and I decided to try something new. There are many recipes for chocolate ganache on the internet, so I combined a few ideas and came up with a recipe I think worked really well.
 Chocolate Ganache
Ingredients:
2/3 cup semi-sweet chocolate chips
½ cup heavy whipping cream
1 ½ teaspoons dark rum (optional)
Put the chocolate chips into a medium-sized bowl.
In a small saucepan, heat the cream just until it starts to boil. Don’t let it boil away. Then pour the cream over the chocolate chips, and whisk them together until the chips have melted.
If you want, you can stir in the rum after the chips have all melted and you have a nice smooth consistency.
 For the cupcakes, I just dipped the tops of them into the ganache. For a cake, you can pour it over the top and let it drip down the sides.
Subscribe to:
Posts (Atom)


